
Equipment should never be returned to production once it is at the new location, only after it has been moved to the new facility. The final post-move installation and calibration is the key to ensuring precision, safety, and reliability. The following steps solve the hidden stresses of transport, ensure the site is ready, and ensure that the machine works as it did prior to transport.
Many teams think that the project is done when the delivery is complete. In practice, vibration, shock, dismounting and re-assembling may cause misalignments, loosen parts or cause slight damage. The post-move installation and calibration process are not finishing operations—these are critical controls to ensure relocated equipment is ready to operate. Correct verification avoids expensive downtime, quality problems, safety occurrences and unforeseen failures.
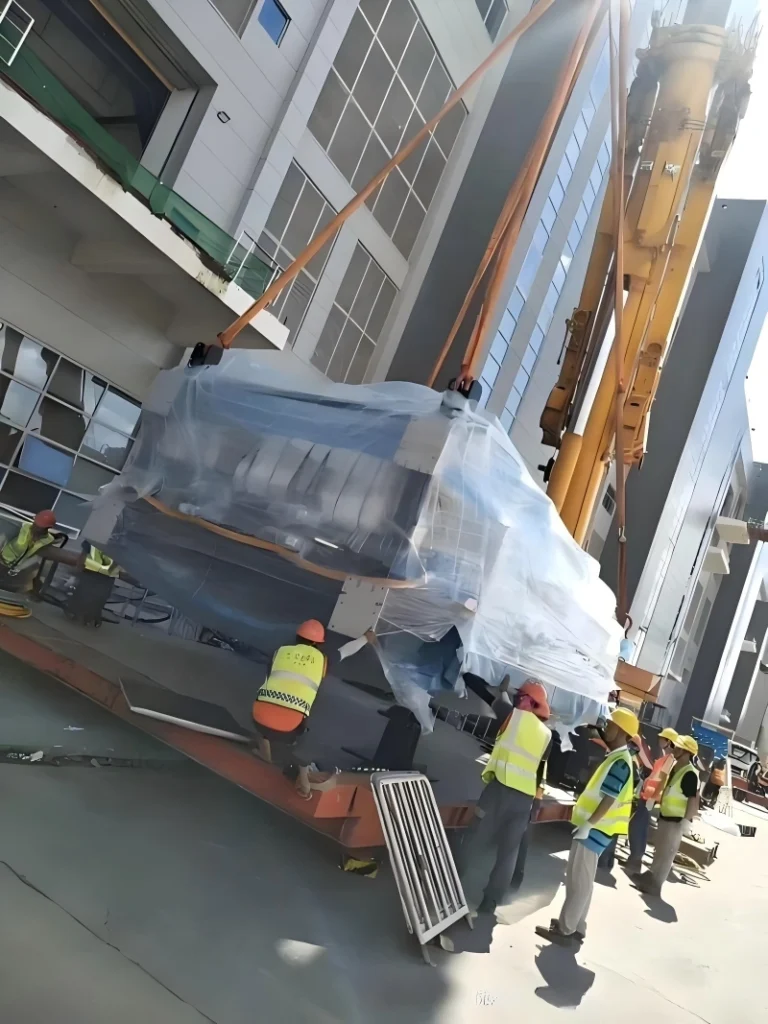
Why Post-Move Installation Matters After Factory Relocation
Post-move installation is the part of the factory move project that follows the move and helps the production to restart successfully. While it may seem that all is well on the outside, there is often something going on on the inside as well.
Services provided by reliable post-move factory relocation support must involve inspection, positioning, reconnecting utilities, leveling, calibration, trial running and final acceptance documentation. These are essential if teams are to begin their production with bad equipment.
Common risks include misalignment causing vibration and causing uneven wear, loose fasteners causing noise and/or malfunction, electrical and/or moisture related failures, and lost accessories causing delays during restart. The correct preparation of the foundation and floors, the correct installation of utility connections, the correct leveling, and anchoring all contribute to long-term performance.
| Post-Move Risk | How It Can Affect Operation | What to Check |
| Alignment Shift | Poor accuracy, vibration, uneven wear | Machine geometry, guide rails, spindle or tool alignment |
| Loose Components | Noise, vibration, malfunction | Fasteners, guards, panels, fixtures, internal parts |
| Electrical Issues | Startup failure or safety risk | Cables, terminals, control panels, grounding |
| Moisture Exposure | Corrosion or electrical faults | Cabinets, exposed metal, sensors, connectors |
| Missing Accessories | Delayed restart | Tools, fixtures, guards, manuals, spare parts |
| Poor Leveling | Machine instability or quality defects | Foundation, leveling pads, anchors |
| Incorrect Utility Connection | Unsafe or unstable operation | Power, air, water, hydraulic, gas, coolant lines |
Step 1: Inspect Equipment Immediately After Delivery
Before unpacking, positioning and reconnecting, there must be a check of arrival inspection. This step provides early detection of transport issues, and defines accountability.
Inspect packaging for rips, broken boxes, water stains, or over-wrapping. Inspect any visible dents, scratches, cracks or bent pieces on the equipment itself. Inspect for condensation, rust and corrosion as well as shock and tilt indicators. Check the state of the equipment against the pre-move pictures and ensure that all the crates, tools, guards, fixtures and spare parts are in place.
| Arrival Inspection Item | What to Verify | Why It Matters |
| Packaging Condition | Tears, broken crates, water marks, loose wrapping | Indicates possible exposure or impact |
| Visible Equipment Damage | Dents, scratches, cracks, bent parts | Identifies handling or transport issues |
| Moisture or Rust | Condensation, water marks, corrosion | Prevents delayed electrical or mechanical failure |
| Shock/Tilt Records | Sensor or indicator status if used | Helps detect hidden transport stress |
| Parts Inventory | Crates, tools, guards, fixtures, spare parts | Prevents restart delays |
| Photo Comparison | Compare arrival condition with pre-move photos | Supports accountability and insurance records |
| Handover Record | Time, location, responsible party, condition notes | Confirms transfer of responsibility |
Document everything thoroughly. Damage should be reported to the transport company and insurance company as soon as possible before it gets cold.
Step 2: Confirm Destination Site Readiness Before Installation
Often the installation is delayed by the fact that equipment is not ready to be installed at the new site at the time of its delivery. Advanced readiness check prevents unnecessary repositioning and loss of time.
Check foundation strength, flatness, anchor positions and vibration control measures. Verify the load capacity of the floor for both transporting and final location. Check equipment layout, working clearances and access / temporary storage area. Make sure that all necessary facilities are in place and that lifting equipment such as cranes, forklifts and gantries have clear access. Define safety zones and pedestrian routes as early as possible.
| Site Readiness Item | What to Confirm | Risk If Not Ready |
| Foundation | Strength, flatness, anchor positions, vibration control | Installation delay or unstable operation |
| Floor Load Capacity | Route and final position load limits | Floor damage or unsafe setup |
| Equipment Layout | Final location, orientation, spacing | Repositioning and lost time |
| Working Clearance | Space for operators, maintenance, and material flow | Poor workflow or safety issues |
| Utility Availability | Power, air, water, gas, hydraulic, coolant lines | Equipment cannot be tested |
| Lifting Access | Crane, forklift, gantry, or rigging path | Unloading and positioning delay |
| Safety Zone | Restricted areas and pedestrian routes | Worker injury risk |
Step 3: Position, Level, and Anchor the Equipment Correctly
When positioning and leveling is off, machine stability and accuracy suffer, particularly with precision machinery such as CNC machines, presses, and assembly lines.
Mark final location as per approved layout drawing. Be sure that the level is adjusted to the manufacturer’s recommended level by using leveling pads or shims. Correct installation and torque of anchor bolts. Make sure that there is complete base contact with the foundation and use vibration isolation pads as necessary. Ensure alignment with machines and sufficient clearance for maintenance access. Do not push equipment into position.
| Positioning Task | Why It Matters | Practical Check |
| Final Location Marking | Ensures machine matches production layout | Confirm layout drawing and floor marks |
| Leveling | Supports machine accuracy and stability | Check level according to machine requirements |
| Anchoring | Prevents movement during operation | Verify anchor points and bolt condition |
| Base Contact | Distributes machine load properly | Check pads, shims, and foundation contact |
| Vibration Isolation | Reduces vibration transfer where needed | Use isolation pads if specified |
| Line Alignment | Keeps connected equipment working together | Check conveyors, feeders, robots, or downstream units |
| Maintenance Clearance | Allows safe access after restart | Confirm space around panels and service points |
Step 4: Reconnect Utilities and Verify System Connections
Reconnections must be performed according to the specification, drawing and labels as documented and not based on memory.
Check electrical connections, earth connection and control wiring. Inspect all air, hydraulic, water, coolant, pneumatic and gas lines to ensure they are routed properly, rated for the correct pressure, and have no leaky connections. Verify sensor locations and safety interlocks. Before turning on the power, conduct comprehensive leak and running tests on a lubrication system.
| Utility or Connection | What to Verify | Risk If Incorrect |
| Electrical Power | Voltage, phase, grounding, terminals | Startup failure, short circuit, safety risk |
| Control Wiring | Labeled cables, terminals, communication lines | Control errors or system faults |
| Air Supply | Pressure, fittings, leaks | Unstable pneumatic operation |
| Hydraulic Lines | Correct connection, pressure, leakage | Damage, oil leaks, unsafe movement |
| Water/Coolant Lines | Flow direction, sealing, pressure | Overheating or leakage |
| Gas Lines | Approved connection and leak checks | Safety hazards |
| Sensors and Interlocks | Correct position and function | Unsafe or inaccurate operation |
| Lubrication System | Oil level, lines, pumps, grease points | Premature wear or machine damage |
Step 5: Perform Mechanical Alignment and Calibration
Machinery calibration following a move ensures that any changes in accuracy that may have occurred during the move or reinstallation are made up.
Check on the mechanical alignment of geometry, axes, spindles and connected systems in accordance with manufacturer specification. Adjust sensors, measurement devices, temperature and pressure controls, and/or any automation. Check synchronization in multi-machine lines between conveyors, robots or feeders. Maintain calibration records for future reference.
| Calibration Area | What to Check | Why It Matters |
| Machine Geometry | Level, straightness, squareness, axis movement | Restores precision and repeatability |
| Spindle/Tool Alignment | Runout, position, tool path accuracy where relevant | Prevents machining or process defects |
| Sensors | Position, signal, response accuracy | Supports automation and safety functions |
| Control Parameters | Settings, programs, communication links | Restores correct machine operation |
| Temperature/Pressure Controls | Setpoints and response stability | Important for molding, heating, cooling, or process equipment |
| Conveyor/Line Timing | Speed, synchronization, transfer points | Prevents bottlenecks and jams |
| Fixtures and Molds | Positioning, clamping, alignment | Supports product quality |
| Measurement Systems | Gauges, probes, inspection devices | Ensures output verification accuracy |
Step 6: Run Trial Operation Before Full Production Restart
Trial operation is used to discover hidden problems under controlled conditions before customer orders or high volume production.
Test first with dry runs or no load and then test at low speed and load. Keep an eye on noise, vibration, temperature and leaks. Review samples of output for consistency and quality. Collect and use operator and maintenance feedback. Slowly ramp up only after things are within a reasonable range.
| Trial Operation Check | What to Observe | Possible Issue Detected |
| No-Load Run | Sound, vibration, movement, alarms | Loose components or abnormal motion |
| Low-Speed Test | Controlled function and response | Setup or synchronization errors |
| Loaded Test | Performance under actual process conditions | Instability under production load |
| Leak Check | Oil, coolant, water, hydraulic, air, gas | Connection or sealing problems |
| Temperature Check | Motors, bearings, control cabinets, process systems | Overheating or cooling failure |
| Output Inspection | Product dimensions, finish, consistency | Calibration or alignment problems |
| Operator Feedback | Usability, abnormal behavior, workflow issues | Practical production concerns |
Step 7: Document Acceptance and Close the Relocation Project
Detailed documentation provides a clear record of the proper installation, testing, and delivery of the equipment.
Create arrival inspection, installation, utility check, calibration, trial run, logs and corrective actions, and final sign-off forms. Attach pictures of the finished installation. All parties are protected and a foundation for future maintenance.
| Acceptance Document | What It Should Include | Why It Matters |
| Arrival Inspection Report | Condition, photos, packaging status | Confirms delivery condition |
| Installation Record | Positioning, leveling, anchoring, layout notes | Shows setup was completed |
| Utility Check Record | Power, air, water, hydraulic, gas, coolant connections | Supports safe operation |
| Calibration Report | Alignment, settings, measurement results | Confirms machine accuracy |
| Trial Run Record | Test conditions, observations, results | Confirms readiness before production |
| Issue Log | Problems, owners, corrective actions | Ensures unresolved items are tracked |
| Final Acceptance Form | Sign-off by operations, maintenance, or project team | Closes relocation responsibility |
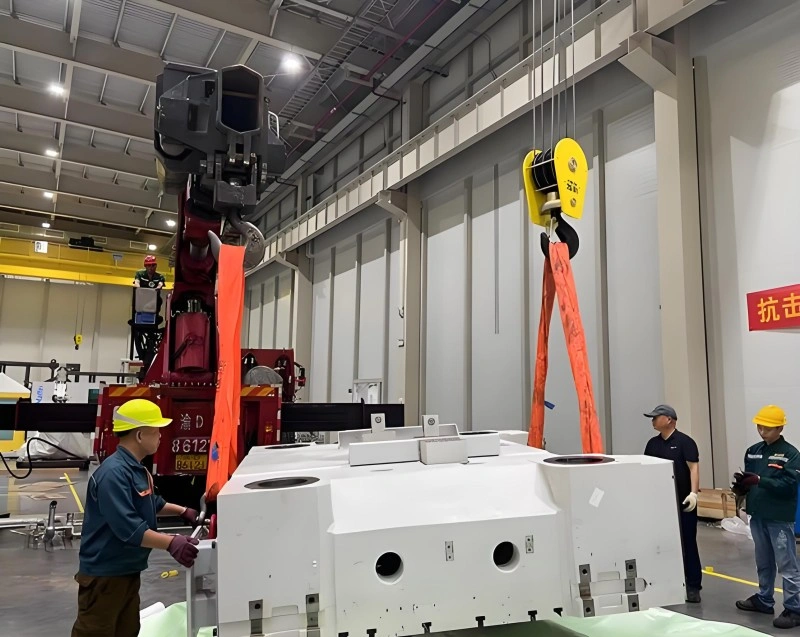
Common Post-Move Installation and Calibration Mistakes to Avoid
It is possible for even the best teams to miss some of the details that can cause big issues as they get ready to restart the production.
Typical mistakes are “speeding up” the restart, failing to check the arrival, neglecting foundation checks, connecting without checking labels, not leveling or checking for calibration, and not recording results. Every error can cause the potential issues to reveal themselves when tested under full production.
| Mistake | Why It Creates Risk | Better Practice |
| Restarting Too Quickly | Hidden damage or connection errors may go unnoticed | Complete inspection and trial operation first |
| No Arrival Inspection | Transport damage may be missed | Inspect and photograph equipment before installation |
| Poor Foundation Check | Machine may operate unstably | Confirm floor strength, levelness, and anchors |
| Unverified Reconnection | Wrong cables or hoses can cause failure | Use labels, drawings, and checklists |
| Skipping Calibration | Product quality may be unstable | Calibrate before full production |
| No Trial Run | Problems appear during real orders | Run dry, low-speed, and loaded tests |
| No Acceptance Record | Responsibility and completion are unclear | Use reports, issue logs, and sign-off forms |
Post-Move Installation and Calibration Checklist
Follow this practical checklist to make sure you don’t forget anything after industrial equipment relocation.
| Stage | Checklist |
| Arrival Inspection | Check packaging, visible damage, rust, moisture, shock indicators, parts inventory, and handover records |
| Site Readiness | Confirm foundation, floor load, layout, access route, utilities, lifting space, and safety zones |
| Positioning | Place equipment according to layout, check clearance, level base, anchors, and vibration isolation |
| Reconnection | Verify power, grounding, air, water, coolant, hydraulic, pneumatic, gas, sensors, and control cables |
| Alignment | Check machine geometry, line alignment, fixtures, molds, robotics, conveyors, or connected equipment |
| Calibration | Verify measurement accuracy, settings, sensors, control systems, pressure, temperature, or process parameters |
| Trial Operation | Run no-load, low-speed, loaded testing, leak checks, vibration checks, and output inspection |
| Acceptance | Record results, close issues, collect sign-offs, and document production readiness |
Conclusion — Equipment Is Ready Only After It Is Verified
The relocation of factories is not considered complete until the equipment has been installed at the new location. Post-move installation and calibration is to verify that machinery is safe, stable, accurate and ready for operation. Completing arrival inspection, site readiness checks, positioning, leveling, utility reconnection, alignment, calibration, trial operation, and final acceptance are done in a systematic manner, to minimize downtime, ensure product quality and reduce safety hazards caused by installation and commissioning.
When returning to production, operations teams can rely on these verification steps to give them the confidence to resume operations. The additional time investment will almost always prove to be worthwhile in terms of smoother ramp up and less surprises further down the line.